
Got a curious mind? Róise McGagh looks at the benefits of informal learning and lists ideas to spark some creative experiments at home
Many parents are finding it difficult to help their kids to stay occupied and take some interest in their school work since everyone has been sent home. Some kids might not have been sent home with a sufficient amount of work and some of it might just genuinely be not very engaging.
What can be a great way to keep your child learning is to use a different approach. Something that is done a lot in home schooling is self-directed learning. This is an inquiry-driven approach which places the responsibility of what and how to learn on the student. The idea is for the student is to approach any learning situation with a set of objectives, a knowledge of what resources and strategies are available to them, and an understanding of how to assess their own learning.
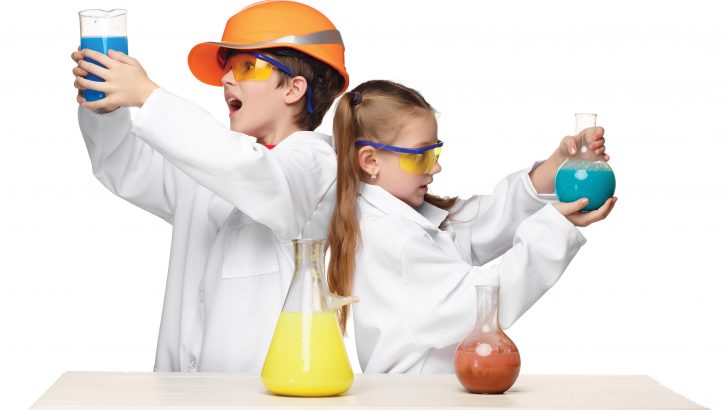
A great way to begin to spark some ideas and get this process going for kids is science experiments. They can be great fun and can create an interest in different topics and then they might be inspired to take control of their learning and put time into looking at what is of interest to them. Of course this isn’t exactly course work, but it can be a catalyst for bringing more creative methods into helping your kids learn while they are away from school.
Science is something that is present in our lives every day, it explains how we breathe, why bread rises, why things fizz and why the sun goes up and down. So there are many way to make it some alive my just using what you have in your home and your back garden.
Let’s start with a classic, the at home volcano.
This should be done outside or in a large basin so as not to cause a mess, you are literally setting off a volcano after all.
What you need is 10ml of dish soap, 100ml of cold water, 400ml of white vinegar, food colouring (optional), half a cup of baking soda mixed with half a cup of water and an empty two litre bottle. What can make it even better is if you use the bottle as a paper mache base and create a volcano shape then paint it so it looks just like the real thing.
When your volcano and ingredients are ready to go, combine the vinegar, water, dish soap and two drops of food colouring into the opening at the top. Then quickly pour your baking soda and water mix into the volcano and stand back!
What happens is a chemical reaction between the vinegar and baking soda creates a gas called carbon dioxide. This is the same kind of gas used to make fizzy drinks fizz and you know what happens when you shake that up. The gas gets excited and tries to spread out. Isaac Newton’s third law of motion comes in – every action has an equal and opposite reaction. Since there’s not enough room for it to spread out it shoots up through the opening, causing an eruption!
You can mix it up and see if different measurements make for different kinds of explosions.
For this next one all you’ll need 50 small pieces of paper, a pencil and some coloured crayons. Have you guessed what it is? A flip book!
First think of what animated thing you want to draw and what will happen throughout out the flip book – keep it simple because you will have to draw it many times over.
Drawing your first picture, on the first small piece of paper.
The next few steps are the same except this time take a new piece of paper and lay it over the last image, then trace the picture. However leave out the part that you want to move. For example a hand is waving in the new image then don’t that hand, draw a new hand in the position you want. When you’re finished all the images then you can colour, but make sure the colours in each image match. Don’t forget to number each image so you can stack them the end, back to front.
Then flick through your book and watch the image move. How does it work? Our brains are able to fill in the motion between frames or different images. So as we view the image broken by the pages moving, the imagery is no longer blurry. It is basically an optical illusion that is known as persistence of vision. This can also be done with a zoetrope which is a simple device from before animation even existed. The viewer looks through the slits in a spinning cylinder and sees an animated image. They are a bit more complex to make but you can also try it at home.
Here’s another one: have you ever wondered how plants know which way to grow? Do seeds have ‘this side up’ written on them in really small letters? Plants will always grow towards the sun and the effect, phototropism, is something you can easily experiment with at home. All you need is a potato that’s beginning to sprout, a shoe box, a scissors, and some obstacles: that’s right, you’re going to set up a maze for a vegetable.
Start by cutting a hole about the size of a €2 coin in the side of the shoe box. Take the lid off the box and put the sprouting potato on the further corner from the hole. Place a number of obstacles between the potato and the hole, but make sure to leave a path for the roots to get through and replace the lid.
Leave your potato maze on a windowsill or somewhere else that it will get plenty of light. You can either wait a couple of weeks for the potato to sprout from the hole or check it every few days to see how your spud is getting on. Whatever you decide, the potato sprout will find the light and you’ll have proven phototropism in your own home.
All you need for this last one is an empty Pringles, a marker, a ruler, scissors, a thumbtack, masking tape, aluminium foil, and a bright sunny day.
You take the plastic lid off the Pringles can and clean it. Draw a line with the marker all the way around the can, about 5cm up from the bottom then cut along the line so the tube is in two pieces. With the thumbtack, poke a hole in the middle of the metal end on the shorter bottom piece.
The plastic lid will be used as a screen. If your lid is clear, you may need to put a piece of tissue paper or tracing paper on it to make it translucent. Put the plastic lid onto the shorter piece. Put the longer piece back on top and tape them all together.
Use the tinfoil to wrap around the tube twice and tape it in place and tuck away any extra bits into the top, the inside needs to be totally dark so you might have to wrap your hands around the end of the tube when you bring it to your eye.
Go outside on a sunny day. Close one eye and look through the tube with the other.
Look around the lid makes a screen that should show upside-down colour pictures.
Light from the scene you’re looking at passes through the pin hole and projects an inverted image onto the lid in the tube. This is known as a camera obscura which is Latin for “dark chamber”.
These are just a few ideas to get you started, there are a huge amount of online resources for these kinds of experiments that you can do with a minimal amount of materials. And they might just get your kids enthusiastic about learning.